I Am SO Sorry For The Super Long Response, But I Thought This Might Make A Nice Little Tutorial Opportunity,

i am SO sorry for the super long response, but i thought this might make a nice little tutorial opportunity, since soft body physics can be… frustrating, to say the least. i’ve noticed that it tends to respond better to spherical meshes than most others, so getting it to work with something with a lot of hard edges and flat planes can be a little tricky (at least in my experience).
so! to get started, here’s my basic setup

the only thing i’ve done so far is place my object in the scene, along with a plane to act as the ground and a camera to record everything.
next you want to select your object, and in the properties menu on the right, select the physics tab (should be the very last one, the icon looks like a bouncing ball)

and for your object, you want to apply a collision and a soft body modifier (some people use rigid body instead of collision, so if you have issues with one there’s a chance the other might work out better. as for me, i usually stick to collision)

then select your plane and apply the collision modifier only.
now when you hit the play button at the bottom of the screen, this happens

it’ll just kinda float in place.
so to fix that, you select the object, go back into the physics menu, and look at its soft body settings

now uncheck the box that says “Soft Body Goal” (this’ll let gravity do its thing)

now when you press play after that

poor dude just kinda dies.
so there are a couple things i like to do to help it not… do… whatever that is.
go back into your object’s soft body menu and click on the tab that says “Soft Body Edges”

now underneath where it says “Collision:” you want to make sure that you have either “Edge” or “Face” (or both, why not live a little) applied to the object (this can help prevent clipping!)

we’re trying to make it wiggle n’ jiggle while still maintaining its shape, so what usually works for me is to crank up the “Bending” spring as high as it’ll go (which is 10) and enabling “Stiff Quads”

and we’re left with this!

and that’s how i do it! there are probably more efficient ways to get this effect, but for me

More Posts from Nastysynth and Others


Seriously, where did Steve find that armor? I hope he didn’t steal it from an aggressive warrior or something…I don’t want him to get in trouble, ya know? It’s been a year since this tutorial is on Patreon, so I’ll post it for everyone now! (I have to work on a reptile scales or transparent materials tutorial one day tho)
Underwater tutorial: https://darhak.tumblr.com/post/642964456883765248/steve-why-is-he-always-like-this-metal-tutorial
Fire tutorial: https://darhak.tumblr.com/post/186828219798/thats-my-first-and-probably-not-last-art


FLOWER SYMBOLISM IN TOKYO GHOUL
From this gif post (taken with permission)
First off, we have

White carnation: innocence, remembrance
This could both represent the Keneki we see at the beginning of the series, and the inner reminiscing of the past by the current Kaneki.
Don’t forget, don’t forget
Remember who I am
The flower was stained in blood, resulting in a

Striped Carnation: refusal (I’m sorry I can’t be with you, but I wish I could)
This could be viewed as his necessary rejection of his past self, regardless of how strongly he has been clinging on to it so far. This reminds me of these two separate lines from the OP
The me that has stood in this shaken, distorted world-
Was pierced by the memory of the time I laughed so innocently
It starts as just a droplet of doubt, but Kaneki has to accept the reality, no matter how unpleasant it is
and finally,

Red Spider Lily/ Higanbana: the flower of death
Higanbana is a very famous flower in Japan so the meaning is clear here. This flower is associated with loss, longing, abandonment and lost memories. It is believed that if one meets a person one will never see again, this flower will grow along one’s path. I find that there are elements of yearning and regret a midst the finality and interpret this as Kaneki being forced to abandon it all- the death to his former self.
I have changed; I can’t return anymore
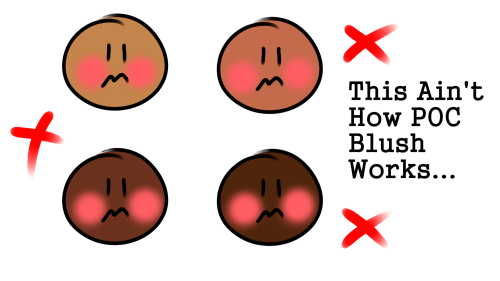
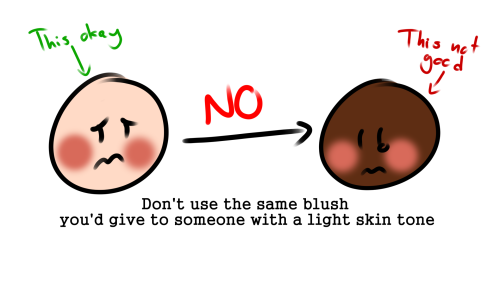
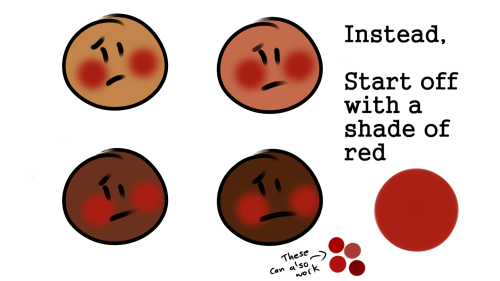

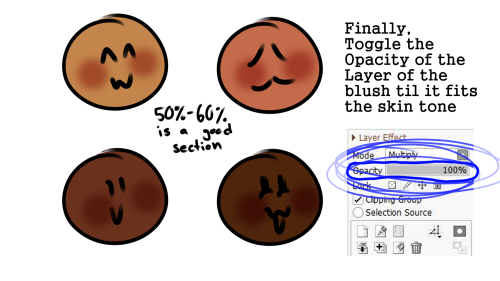
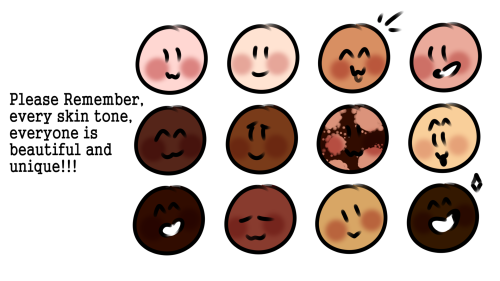
POC blush tutorial
Feel free to repost, but please credit me
Oof those action shots are 👌👌👌
Action shots like this one need a lot of planning. Let’s have a look about how I made this scene!

MAIN ACTION LINE:
The important aspect is the flow. You have to find a way to make the action easy to understand. I chose the main poses, but all of them are following a base action line. This line can have different shapes and curves, but I chose one that follows left to right , then down: occidental reading flow.
But it’s not over yet!

SECONDARY ACTION LINES:
Okay these bad boys make the « oh wow this is fluid » effect. Each characters have their own motion trail, based by the main action line. It mostly affects the elements like the capes, the hair and the particles in that case.

*GASP*
YES, I’m shook too. Battle drawings are so fun to make!
Comic where the fight scene is: Wanted part 17


Pallete challenge but i did some crappy background lel.


tusky business


Hi here’s a mech tutorial
I use shitty pc builds and cars as references


Since I have a long-form comic taking place in a sorcerer’s tower, I did a little study to level myself up on the subject of stonework walls. These are my notes on what I want.
Especially focusing on an effective way to render the background walls without drawing every single stone because aaaaa

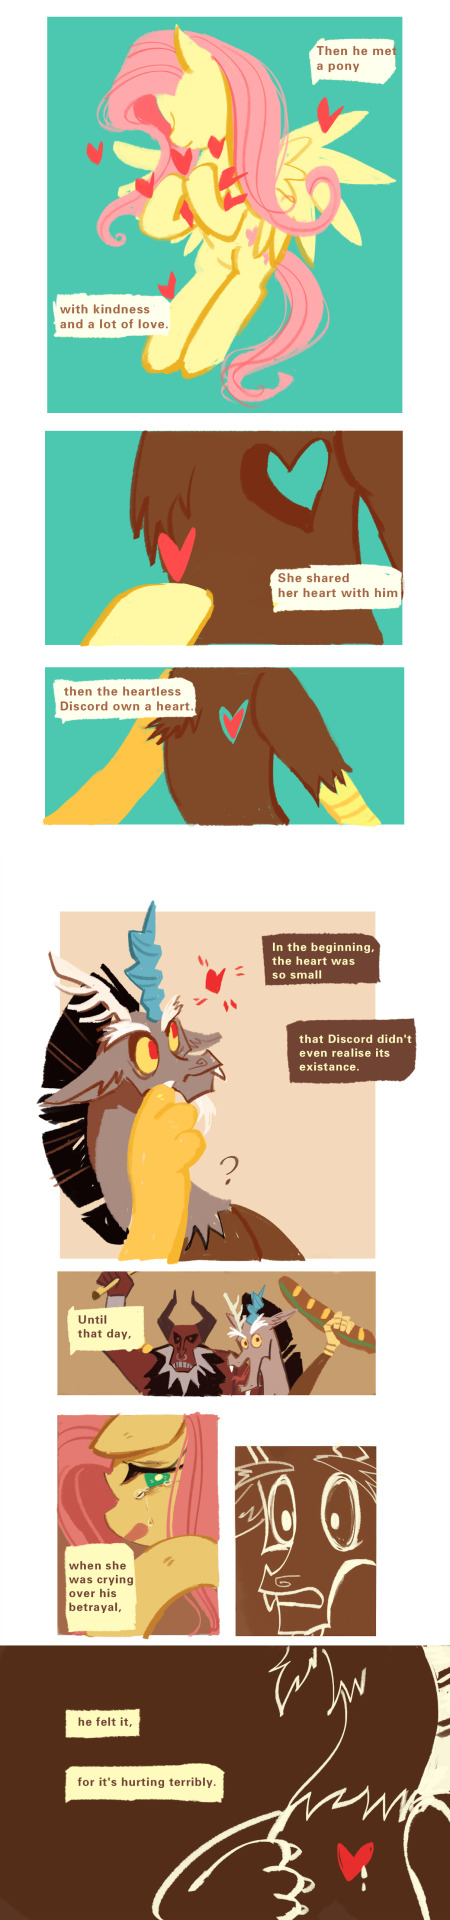

FLUTTERCORD COMIC: <<HEART>>
I’m glad that I can finish this on time.
Season 9 is over, but I know their stories will not stop.
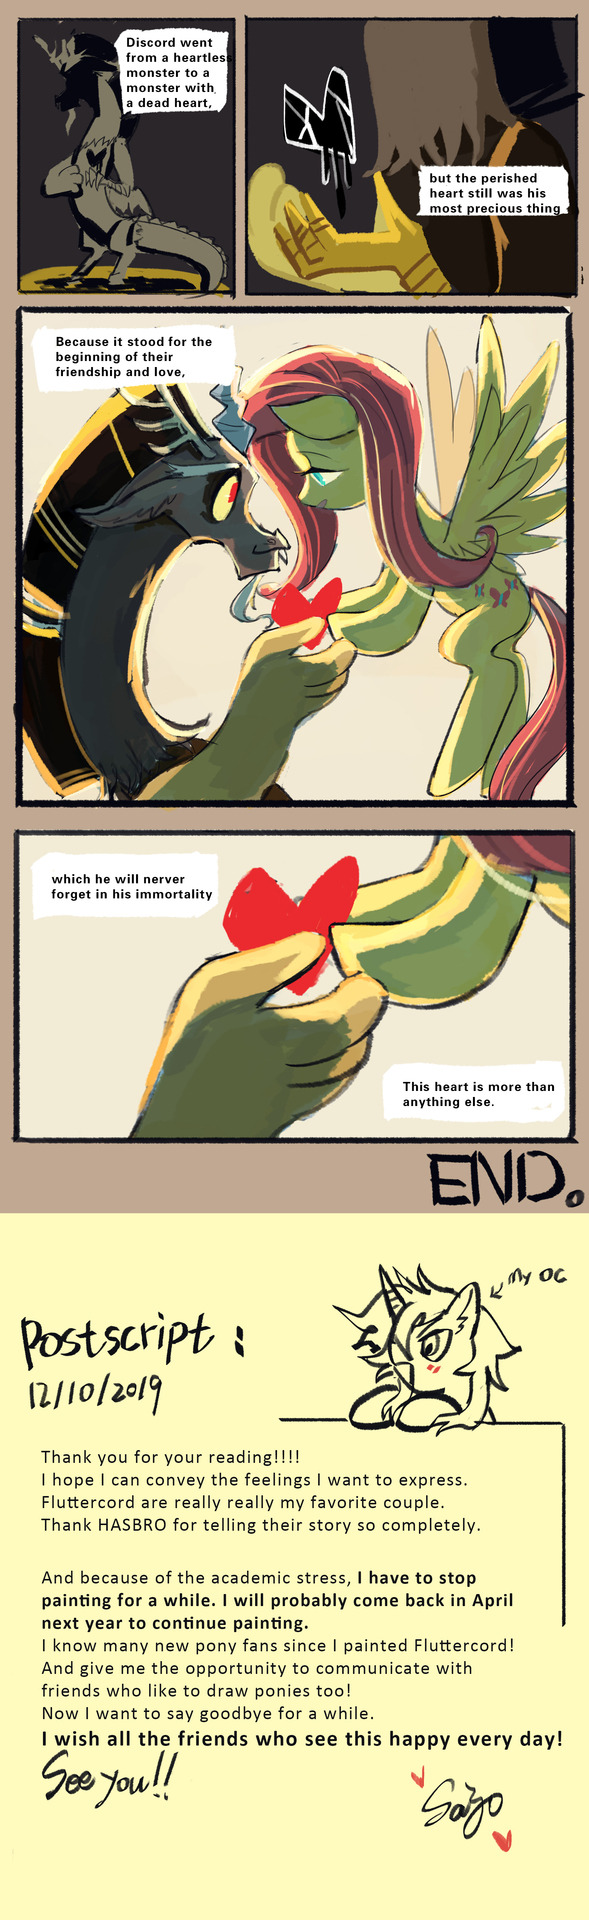
I love them forever.It’s like I know they’ll always love each other.
And now I have to stop updating for study.
I’ll be back in April next year to continue drawing. See U!!!!!

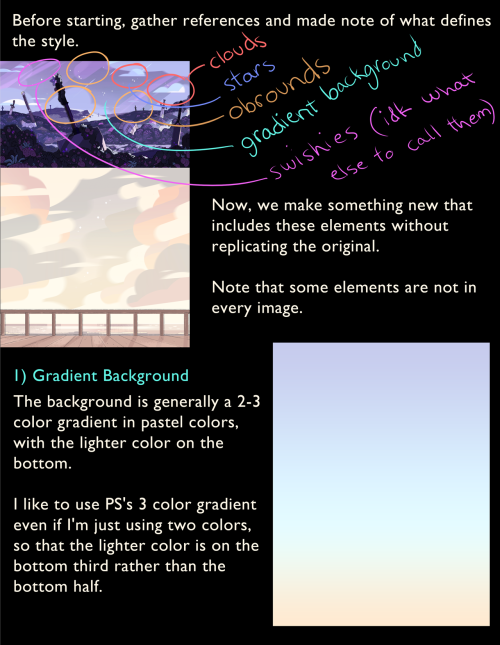
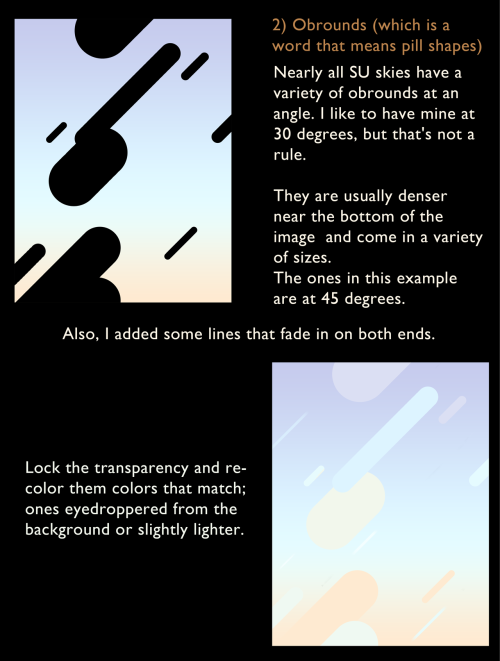

In conclusion, obrounds.
Sorry for the long post (I think it’s most legible in this format but yikes it’s long)
-
 hueywheel liked this · 10 months ago
 -
 chunrao liked this · 1 year ago
 -
 pineconepal liked this · 1 year ago
 -
 autistrope liked this · 2 years ago
 -
 legoliomanikas liked this · 2 years ago
 -
 dy-nevers liked this · 2 years ago
 -
 goblinratman liked this · 3 years ago
 -
 midas-howls liked this · 4 years ago
 -
 commecietca liked this · 4 years ago
 -
 pompsh liked this · 4 years ago
 -
 nastysynth reblogged this · 4 years ago
 -
nastysynth liked this · 4 years ago
-
 simonethewitch liked this · 4 years ago
 -
 joklarodky liked this · 4 years ago
 -
 tarragonesque liked this · 4 years ago
 -
 prodpup liked this · 4 years ago
 -
 theghostadrift liked this · 4 years ago
 -
 starz112 liked this · 4 years ago
 -
 kuronekojei liked this · 4 years ago
 -
 3dartref reblogged this · 4 years ago
 -
 thebigfriendlyartist reblogged this · 4 years ago
 -
 20gag20 reblogged this · 4 years ago
 -
 dragonni liked this · 4 years ago
 -
 unluckyusagi liked this · 4 years ago
 -
 nessiesim liked this · 4 years ago
 -
 saveferrls reblogged this · 4 years ago
 -
 catalystmethod liked this · 4 years ago
 -
 wiresarchived liked this · 5 years ago
 -
 luxfoks liked this · 5 years ago
 -
 blabbing-buttons liked this · 5 years ago
 -
 therattsden liked this · 5 years ago
 -
 piefanart reblogged this · 5 years ago
 -
piefanart liked this · 5 years ago
-
 arilovescocoa liked this · 5 years ago
 -
 chuubbycat liked this · 5 years ago
 -
 caharse liked this · 5 years ago
 -
 vaytart liked this · 5 years ago
 -
 juwulia liked this · 5 years ago
 -
 lithium83 liked this · 5 years ago
 -
 no-one-ask liked this · 5 years ago
 -
 raveniqhts reblogged this · 5 years ago
 -
raveniqhts liked this · 5 years ago
-
 girlbossdennnis liked this · 5 years ago
 -
 truthbetoldimlion liked this · 5 years ago
 -
 electricslug liked this · 5 years ago
 -
 nicey-sandokan liked this · 5 years ago
 -
 ohlookitsmyflower reblogged this · 5 years ago

Sylwester | i will mostly post sketches, because i'm too lazy to end them
196 posts