Hi There!! First Off Thanks So Much For Spending All That Time!!


Hi there!! First off thanks so much for spending all that time!!
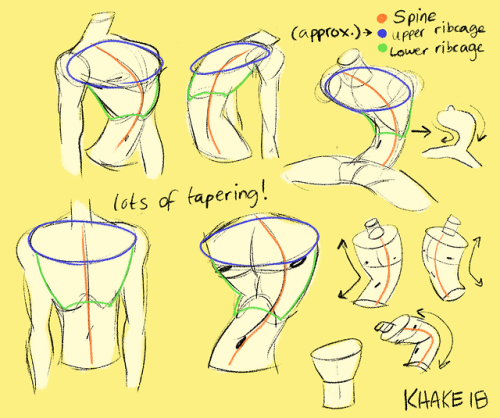
To be honest I’m still trying to get comfortable with anatomy….however I do have a lot of fun making bendy torsos (thanks to Junkrat’s horrible posture) and I think I’ve stylized them enough to make a tutorial on them.
I almost always start my drawings with a C-curve/S-curve to mark the spine, this way I can exaggerate the torso as much as I like. Notice though that in the GIF the C-Curve isn’t actually where the spine is, it’s more of a way to feel the flow of the drawing.
So anyway yeah!!! I hope this helped in some way?? Sorry if it’s not extensive, I’m still learning a lot!! And thanks for the ask, I appreciate the love <3
More Posts from Nastysynth and Others
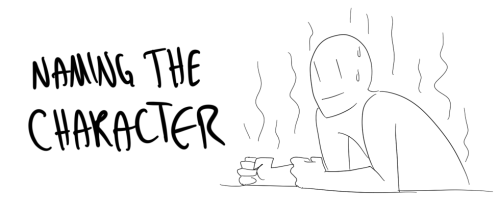
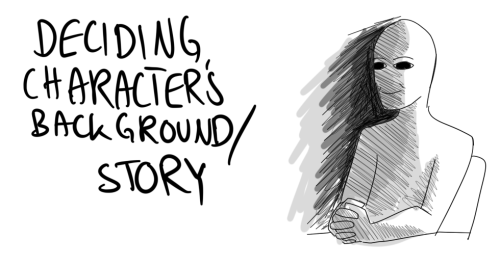
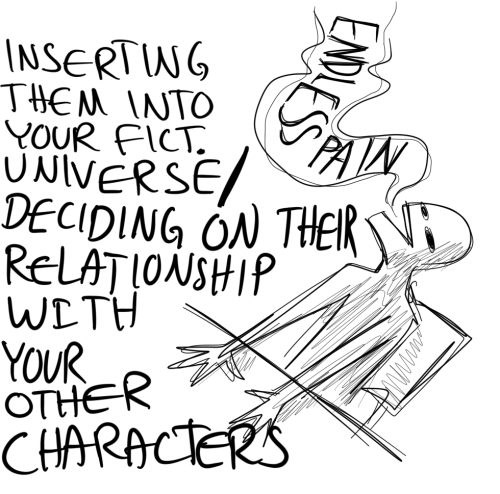
So

Can we just……

Talk about………

All of……………

The…………………….


Similarities??????????????????
More helpful art tips 2
* leads to a twitter thread Tutorials
Drawing a mountain with volume*
Painting the chest*
Color in Painting [Part 1][Part 2][Part 3]*
30+ lessons on drawing in perspective
Six types of fold when drawing drapery
Using references*
IMAG master classes (paid)
Planning values*
Reference
Knee Movements*
Kato Anatomy*
Making Products
A beginners guide to zines
Opening an online store [Part 1][Part2][Part 3]*
Studying Design for TV animation (on a budget)
Lighting in a room*
Windows
Bricks
Form rendering cheat sheet
Brushes
Drawmaevedraw brush set (ps)
Traditional Texture Brushes for Photoshop and Procreate (paid)
Other Resources:
Huge list of resources w/ a focus on getting into the animation industry.
Thread of study resources*
Resume guide (for an internship at nickelodeon)
Agents for Illustrators
Filing Taxes as a freelancer
3D art
Low poly horror in blender (paid)
Blending grass with the landscape (UE4)*
Ghibli Style trees in 3d (Blender)
Spritestack - a voxel editor suited for 2D artists.
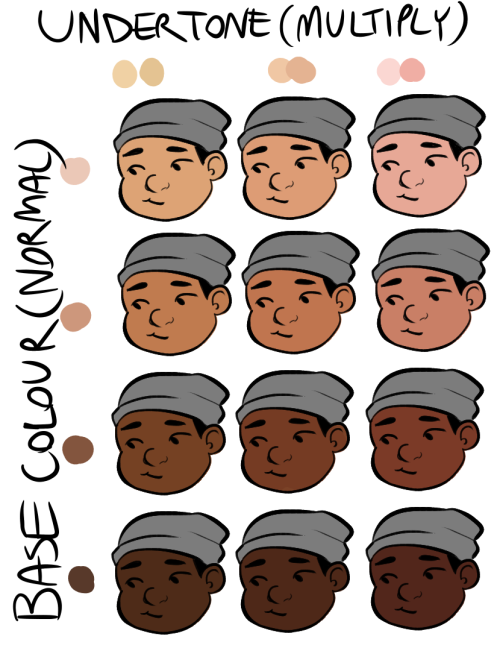
So, you’re planning on drawing characters with certain undertones but you sure don’t want to make some racist yellowface/redface mess. This subject has been touched on a few times, but I figured I’d give my tips to digital artists out there.
Here’s another really quick tutorial from me:
Start with your base colour on a Normal layer.
Open a new layer ontop of it.
On that new layer, use a very pale yellow, orange, pink (or if you want a cool blueish undertone use a slightly purplish light pink) to cover your base skintone with.
Set that new layer to Multiply, and you’re done.
Note: Multiply layers make the colours of the layer underneath it darker, if you’re drawing someone super pale, mess around with an even lighter colour or change the opacity on the layer. Don’t change the layer to Screen or Luminosity, it’ll completely wash out your image.
The undertones in dark skin are a little richer in colour (in fact most yellow undertones in brown skin are more of a golden undertone), so you can make that Multiply colour that’s a darker pastel yellow or red or what have you.
You can also use this trick to show a blush on any skintone as well!

(Though, with blushing, you can’t really blush with dark skin, but if that’s what you want to go for anyways, this trick looks way more natural than random pink circles or lines on top)
And if you want more references on undertones on real people, beauty blogs man. They’re the way to go:
[blog for undertones in pale to light tan skin]
[blog for undertones in tan to dark brown skin]

the suffering never ends


i wanted to update my VERY OLD nose tutorial now that ive learned how to draw! as always, this isn’t an all encompassing guide– just a jumping off point for practice@
do you have any tips for drawing a nose when the face is front facing?
This was really fast but I hope this helps:

Depending on the shape of the nose, the way you chose to render the contour lines will change. I used Rose, Quazky, and Glasner as examples in the lower right corner there. For TH, I generally don’t render the bottom of the nose with a line but with a shadow for simplicity’s sake. I hope that makes sense.
PS - I made a new brush for rendering technical drawings and I love it. *A*


More of an Arcana style guide to go with my colouring guide.
I tried to cover key aspects that make the style distinct so I hope this can be useful :D
If you struggle drawing heads in different angles watch this!
OMG I found this video and it is a absolute goldmine! Its filmed by a Disney story board artist and they make drawing heads in any angle easy! now granted it takes practice to get this technique down but it soooooo helps.
The video below goes into deep details.

![Patreon: [patreon.com/lunaartgallery]](https://64.media.tumblr.com/6dd76e17df224b3826e5866282b6cd57/6ab8034c06b9e862-5e/s500x750/25f94543a8524d030c9cff0e9a9786daa2174e4c.png)
![Patreon: [patreon.com/lunaartgallery]](https://64.media.tumblr.com/ec25543ee78d89a38f34fc59a6e126ec/6ab8034c06b9e862-fb/s500x750/cffc02b6e72d78c6ec0e718591773a8126fa8e8b.png)
![Patreon: [patreon.com/lunaartgallery]](https://64.media.tumblr.com/1716c74ce43b8492822be5cdd59a5361/6ab8034c06b9e862-eb/s500x750/a15ed68ec5e79800e2c4084a7dce932388788006.png)
![Patreon: [patreon.com/lunaartgallery]](https://64.media.tumblr.com/7cd552c8503df33edca0d09509f91dbc/6ab8034c06b9e862-3b/s500x750/5351cb62cc31e8805197148e8b20b496b1015ef9.png)
![Patreon: [patreon.com/lunaartgallery]](https://64.media.tumblr.com/5976e680b65f566912194b7509bbc3f5/6ab8034c06b9e862-65/s500x750/1f99cfdfee09332c1dd4a1a3824f7c83dcd4f917.png)
Patreon: [patreon.com/lunaartgallery]
My last drawing tutorial was back in 2017, whoa, welp it looks like my drawing skills have gotten better. Since I have some more spare time, I will be doing new/updated art tutorials revisiting some of my previous topics.
I’ll post the tips publicly but my reference material and examples will be Patreon exclusive. If you like these tips and want to see more, support my Patreon! It allows me to focus on more material like this and I would really appreciate it .
Thanks! ——-—— Devi: [deviantart.com/miss-noidentity] Twitter: [@LunaArt_Gallery] Instagram: [@lunaartgallerys]
-
 sillygoblinantics liked this · 1 month ago
 -
 misstah-joe reblogged this · 2 months ago
 -
misstah-joe liked this · 2 months ago
-
 frosty-tian liked this · 2 years ago
 -
 chemistfail liked this · 2 years ago
 -
 sunlitbones liked this · 2 years ago
 -
 toxicmonsters liked this · 2 years ago
 -
 ivyclover reblogged this · 2 years ago
 -
ivyclover liked this · 2 years ago
-
 etcdraws reblogged this · 2 years ago
 -
 silverhawk7669 liked this · 3 years ago
 -
 meowsod liked this · 3 years ago
 -
 cryptfullofspiders liked this · 3 years ago
 -
 uponhumanzhill liked this · 3 years ago
 -
 shortlee-blog liked this · 3 years ago
 -
 el-slime liked this · 3 years ago
 -
 tuturialreblog reblogged this · 3 years ago
 -
 purplemuffindreamzine-blog liked this · 3 years ago
 -
 mightylito liked this · 3 years ago
 -
 aannndddyyy liked this · 3 years ago
 -
 epic-art-help reblogged this · 4 years ago
 -
 kostraex-blog liked this · 4 years ago
 -
 arundolyn liked this · 4 years ago
 -
 afroman1020 reblogged this · 4 years ago
 -
 itsiffysworld liked this · 4 years ago
 -
 super-multidimensional-wizard liked this · 4 years ago
 -
 seer413 liked this · 4 years ago
 -
 craftytrashnightmare liked this · 4 years ago
 -
 tsennko reblogged this · 4 years ago
 -
 kitty-draws-stuff reblogged this · 4 years ago
 -
 oneday-for-sure liked this · 4 years ago
 -
 agothorn-arts reblogged this · 4 years ago
 -
 agothorn liked this · 4 years ago
 -
 skyhedgefox liked this · 4 years ago
 -
 theshadowishere liked this · 4 years ago
 -
 arkashayu liked this · 4 years ago
 -
 pelagicat reblogged this · 4 years ago
 -
 kayladaplayah liked this · 4 years ago
 -
 amarisstarbound liked this · 4 years ago

Sylwester | i will mostly post sketches, because i'm too lazy to end them
196 posts