Ladyofunknown - Meeeeeh... Hallo!!!

More Posts from Ladyofunknown and Others
I thought I’d share this because it’s basically a documentary on the fandom from someone not in it and MY WORK MADE AN APPEARANCE TWICE AND I WAS LIKE GJFKDK. BOTH A PAGE OF FELLSWAPX AND UNDERVERSE IN A NUTSHELL MADE A BRIEF APPEARANCE.
26:25 & 31:07
WE DID IT BOYS!


REBLOG!!!! SPREAD THIS PLS!!! EVERYONE IN OR AROUND VIDOR PLEASE STAY SAFE!!!


Keanu Thieves (via mushroombirdornaments)
Easy and accurate perspective!
Have you ever started drawing one-point perspective and then realized that even though you could draw the diagonals, you still had no idea where to place objects for relative size?
Welcome to my tutorial for drawing some very easy, flexible, and mathematically accurate perspective grids!
Here’s an example of the kind of thing I do with this.

So you’re just starting to draw your perspective grid on its own layer. You can change the transparency this way and draw things over it later. There’s the horizon line and the vanishing point in the middle.

But when you go in to draw your verticals and horiontals, what is this?? How do you break up the “hall” into even spacing? Just measuring equal sections won’t work.

Luckily there is a trick. Find the point that is ½ of the way to the center.

Then, imagining that point is the bottom of your page, find the halfway point to the center again. Keep repeating the process.

That’s right, each time it shrinks by ½. I call this the ½ perspective method, but if you guessed that it’s the Fibonacci sequence you’re absolutely right. I just didn’t want to say that in the title because the idea of math might scare off some people.
Anyway, use these points to place your verticals and horizontals.

Look at how even that is!

But!!! What if you want to space things a little more closely than that? Well guess what!! It works with literally any other fraction you can think of!

again simply measure the space between your last mark and the center.

What a finished grid in 1/3 perspective looks like!

And the kicker? You don’t even have to put the vanishing point in the center. You can put it anywhere else on the page and the same rules still apply!

See folks this is the sort of thing they should be teaching us in Drawing 1. But for some reason no??
Anyway, I recommend making a bunch of these in different spacings/angles/rotations whenever you’re bored and saving them so that you can just import them later when you need them.
Hope you enjoyed this tutorial!
PAYPAL IS TRYING TO SLIP THE RUG UNDER US. Or they may have said this and just no one read about it or noticed/knew.
OKAY SO BEFORE YOU SEND ANY MONEY FOR THAT AWESOME COMMISSION YOU WANT TO BUY FROM THAT AWESOME ARTIST. PLEASE STOP AND READ THIS.
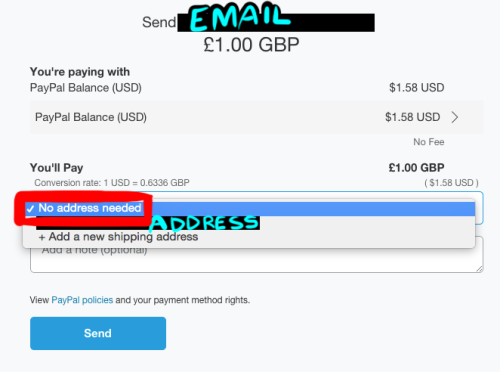
Paypal changed the look of how you will fill out information and send money. Thus, you need to be super careful. Don’t go all willy nilly through and be like “Yeah yeah yeah send” you need to stop when you see this screen right away.
Before you proceed, you will first notice one major thing: your address is showing. What you need to do if you are ordering a DIGITAL WORK (aka, it is being sent to you via the interwebz) is you need to click on your address and there around be a drop down menu of 3 (or more) options:
No address needed
Your Current Address
+ Add a new shipping address
Be sure to select “No address needed”, it is very important that you do. If you leave your address in there, Paypal will assume that you are to receive a physical package. A physical package which needs proof that exists physically. Paypal will want the artist to provide shipping labels and tracking info on said package. This is bad, very, very bad. Artists can get in trouble if they cannot provide these things.
Please, if an artist asks to send you back your money so that you can send it again correctly, do not be offended. You are paying them to do your commission, how can they do your commission with no money?
Reblog this, send this around, if you want to make a proper tutorial go ahead, I hope this was clear enough as it is.


The wedding is about to begin!!
the year is 2019
I have realized something about Sans Undertale. please look at these screenshots under the cut in the order I have arranged them
Keep reading
😂😁😀😝😜😐
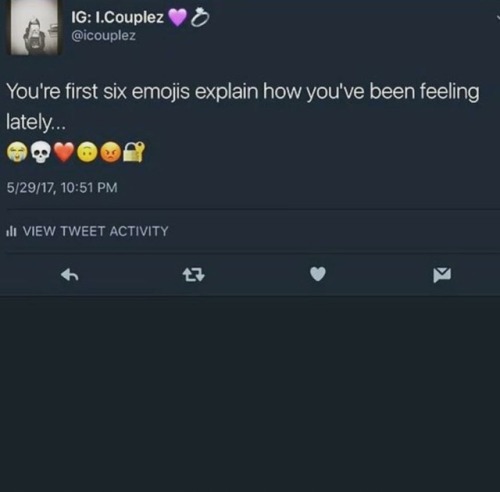
😂🤷♂️👀😭🤔😈
-
 franklyfranksfranks liked this · 6 days ago
 -
 misssickn liked this · 1 week ago
 -
 red-i-mean-blue reblogged this · 1 week ago
 -
red-i-mean-blue liked this · 1 week ago
-
 doesthismakemecrazy reblogged this · 2 weeks ago
 -
 rockandrolldisgrace liked this · 3 weeks ago
 -
 pu55yswag liked this · 1 month ago
 -
 papayup liked this · 1 month ago
 -
 askthesongstress liked this · 1 month ago
 -
 unabashedwastelandpainter reblogged this · 1 month ago
 -
 altmargay liked this · 1 month ago
 -
 rosaleita liked this · 2 months ago
 -
 submerged-in-stories liked this · 3 months ago
 -
 little-honda-aliens liked this · 3 months ago
 -
 that-rat-kid reblogged this · 3 months ago
 -
that-rat-kid liked this · 3 months ago
-
 digitalbug999 reblogged this · 3 months ago
 -
 zodigeek reblogged this · 3 months ago
 -
zodigeek liked this · 3 months ago
-
 chacetic liked this · 4 months ago
 -
 heyahuwu reblogged this · 4 months ago
 -
heyahuwu reblogged this · 4 months ago
-
 livermoss liked this · 4 months ago
 -
 what-if-doctor-who-was-yuri-yaoi reblogged this · 4 months ago
 -
what-if-doctor-who-was-yuri-yaoi liked this · 4 months ago
-
 fandom-hoarder-official reblogged this · 4 months ago
 -
fandom-hoarder-official liked this · 4 months ago
-
 sweetpolkadots13 liked this · 4 months ago
 -
 the-letter-horror-lover liked this · 4 months ago
 -
 confusedunicornis liked this · 4 months ago
 -
 megamindenjoyer reblogged this · 5 months ago
 -
megamindenjoyer liked this · 5 months ago
-
 soundwave-is-true liked this · 5 months ago
 -
 gaycodedvillainy reblogged this · 5 months ago
 -
gaycodedvillainy liked this · 5 months ago
-
 omiteo777 reblogged this · 5 months ago
 -
omiteo777 liked this · 5 months ago
-
 mintyreblogs reblogged this · 5 months ago
 -
mintyreblogs reblogged this · 5 months ago
-
 mileymint liked this · 5 months ago
 -
 annita89slyzpqlkh liked this · 6 months ago
 -
 thehollywoodnecromancer reblogged this · 6 months ago
 -
thehollywoodnecromancer liked this · 6 months ago
-
 thepiedcurrawong reblogged this · 6 months ago
 -
thepiedcurrawong liked this · 6 months ago
-
 yoza22 liked this · 6 months ago
 -
 amariathe reblogged this · 6 months ago
 -
amariathe liked this · 6 months ago
-
 ludex reblogged this · 6 months ago
