Do You Have Any Advice For Maintaining A Celebrity's Likeness In A Drawing Without Compromising Your
Do you have any advice for maintaining a celebrity's likeness in a drawing without compromising your art style? When I try to draw real people they look completely different from how they should be and my art style ends up totally skewed as well. Thanks in advance!
This is a tough skill to develop! but with some hard work and research you’ll be able to do it!!!
My recommendation is to study professional caricature! Even if the end goal isn’t to do exaggerated crazy portraits of the the celebrity, studying the art form can help you learn to apply those concepts more subtly in your own style!
The key element of caricature is studying a persons face and looking for what makes them unique or different from the ‘standard’ anatomical face model, eg how do their proportions stray away form the ‘rules’.
once you take note of these things experiment by exaggerating them in different ways through quick thumbnail sketches

thumbnails by Court Jones for Proko.com
They might not look like the person right away but keep experimenting! trial and error is your friend!!!
(for more info on Caricature the Proko youtube channel has a whole in depth series by Court Jones the artist above! I Highly recommend checking it out and the other lecture series the channel!)
Once you have done this research you can apply it to your style and design the celebrity just like the design team on Netflix’s BoJack Horseman designed Character actress Margo Martindale! She and many other celebrity cameo’s on the show look like themselves but also like they belong in the world of the show!

The final thought I want to leave you with is: don’t worry too much about art style or let it get in the way of learning new ways to draw. There is a lot of pressure on the internet to find your own unique art style and have everything be consistent all the time but this thinking can actually get in the way of your artistic growth if you focus on it too much or to early.
I Personally dont care about consistency at all in my art, I design the style of the drawing based on the project (eg. am I going to animate this character, is it an illustration, what age group am I targeting? what Genre? if you want to see examples of this I have plenty on my instagram)
I have a lot of feelings on the topic of art styles but I dont want this post to be essay length or take me a week to write so please watch this video by Kesh on youtube about it : Stop Trying to Find Your Art Style He talks about this issue way more clearly and concisely then I ever could!
Hope this Helps!!!
-Mod Todd (ko-fi)
More Posts from Nastysynth and Others
Hey got any tips of drawing in the cr style?
Well first off, study the sprite sheets of the characters. They can all be found on the Cookie Run wiki.To draw in a style it helps to study the style too and figure out the elements of how the characters are put together. For Cookie Run it goes hand in hand with my style because a lot of it is very Geometric. Even with cookies who are oddly shaped.

I talked about this with my Discord once about how basic shapes can really go into making the character design solid and this seems to largely be the basis of how CR renders it’s characters.

Even characters build like Purple Yam and Milk Cookie use this more basic geometry when building the foundation of the character. It all comes down to a more simplistic style based on shapes.

That being said, When I build characters I use basic shapes to do it. That’s why a lot of my earlier drawings of the CR OCs look so different compared to now, because back then I was learning it. The easiest way to do it is to try drawing a CR character, build them as you see them, and then adapt that into how you draw.

And obviously cookies aren’t all the same shape! Shapes really can go into how people will interpret your character and their personality! So don’t be afraid to think outside of the box and look at different shapes for different characters!
That’s about as many tips as I have for now, but that’s the fundamentals over how I go about it.
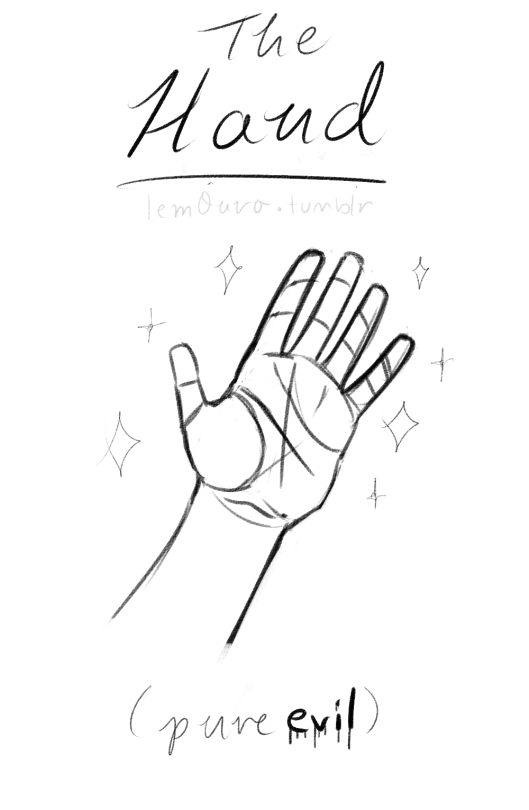
I'm kinda ashamed to ask this, but could you make a tutorial on how to draw hands? ;A;
omg dont be ashamed at all!! Hands are generally tough to get used to, lots of artists struggle with it! so dont be ashamed i feel you.
and I actually have made a hand anatomy guide before in fact! If you want to get better at drawing hands I def recommend you learn the basic anatomy first. Please check out the ones I made, I try to make it simple and easy to understand:
Artistic Anatomy: Hands Part 1
Artistic Anatomy: Hands Part 2
There’s my guide to the anatomy, but here’s some more tips that I’ve noted to myself that I’d like to include
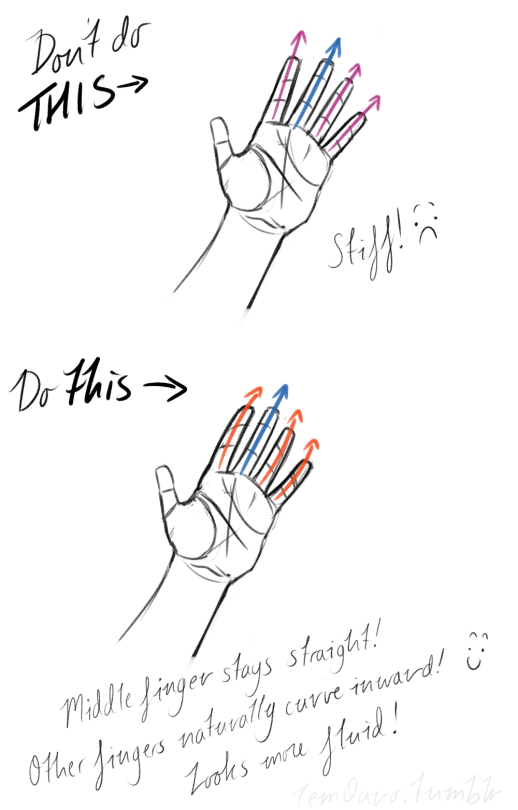
First off, I’d like to just note on the fingers: if you pay close attention to your own hand, you may notice the fingers are ever ever so slightly curved inward. It’s a very subtle detail, but I noticed that, despite how slight it is, it can make a hand look more lively, and less stiff.
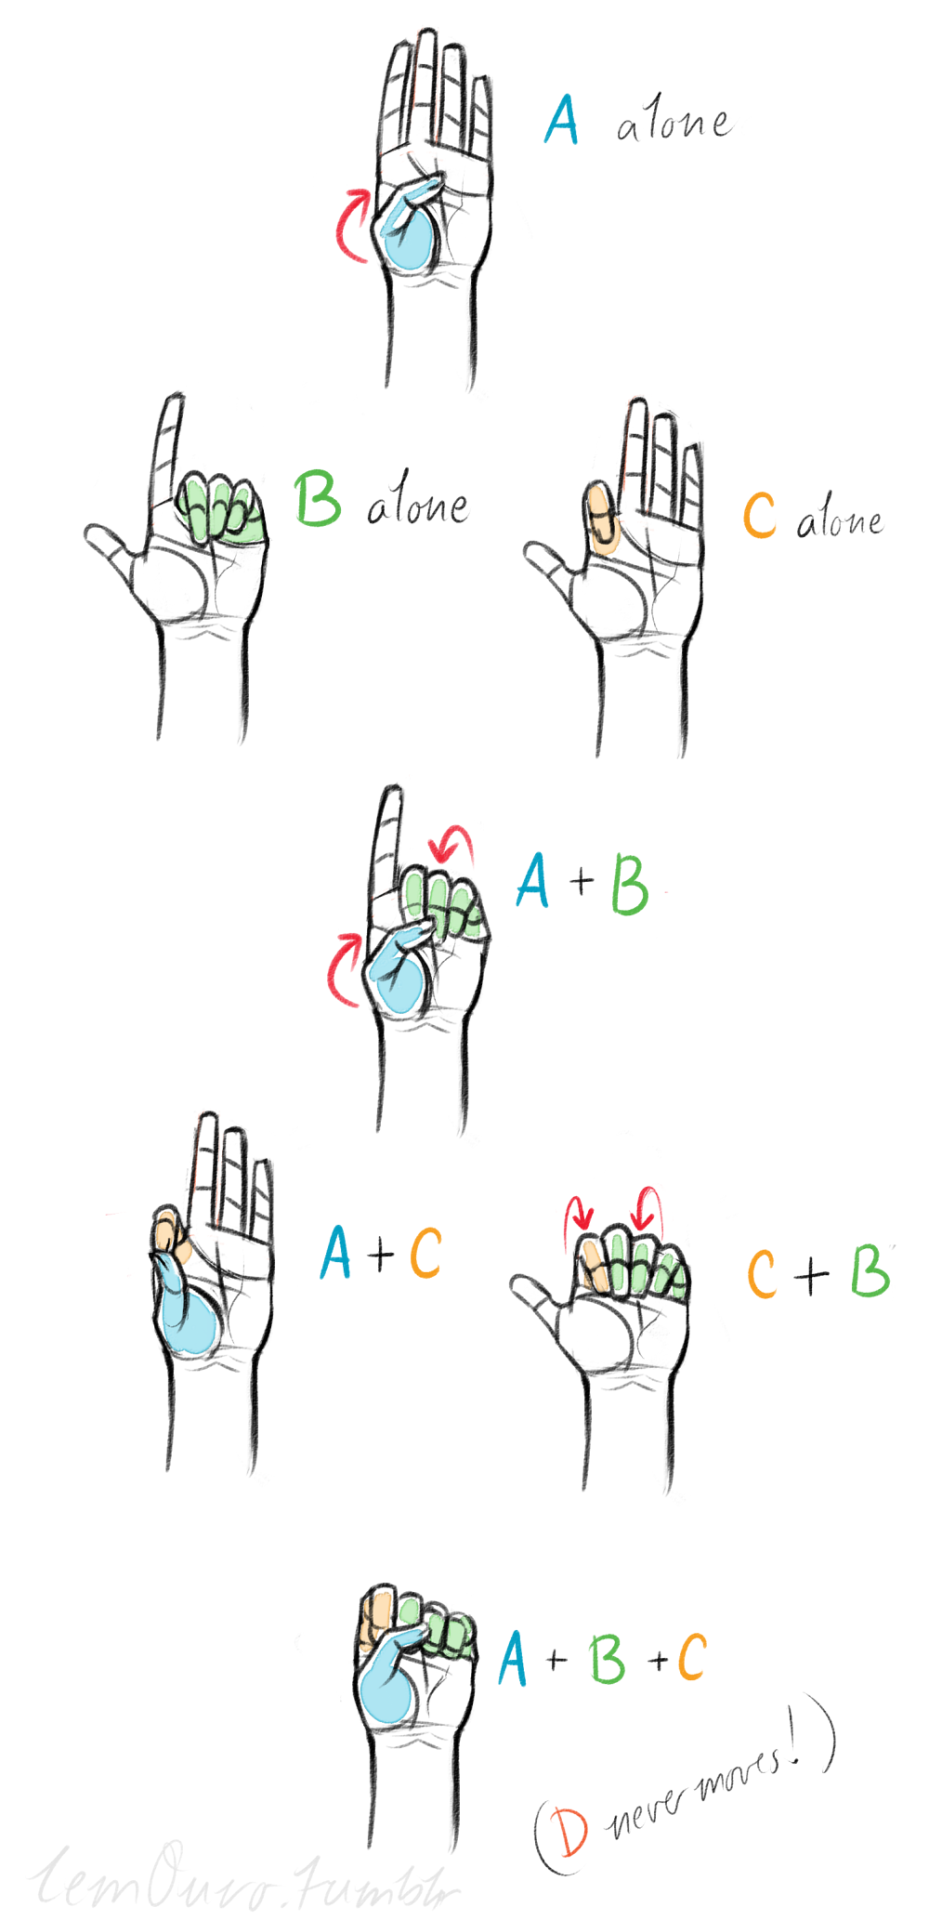
Second, the “M” on the palm! Your hand moves in many ways, and because it does it creates creases in your hand. The most prominent creases appear to make an M shape; this is handy to remember for what I’m going to talk about next. (It also could be a “W” I guess, or to be more specific a “ )X( “; just think of it in whatever way helps you remember!)

SO now that you see the M, draw your hand as a basic blocked shape and add your details. As you do, you can see that the M divides the palm into four basic parts!


When the hand moves, parts A, B, or C of the palm, alone or in different combos, will create the general poses that the hands do normally. These parts are the parts that move, with D being stationary, no matter what!
Here’s a chart of all the possible combos. Once you have down what part of the hand moves for a certain pose, you can change up the fingers and tweak it a bit to do what you need to make it more specific!
This is simply my method of drawing hands. God knows there are hundreds of tutorials out there by other artists, but personally, this way helps me the best (after learning the anatomy first).
This way I can divide the hand and combine the parts in any such way I need!
Hands take a lot of effort to grapple, and you need to practice them a lot, especially foreshortening of the hand; that’s really something you need to learn through your own studies. Look at your own hands, draw hands from life, from magazines, shows, comics; just draw hands! You’ll eventually figure out a method that works best for you. So to get better at drawing hands; draw hands!! And don’t stress over it, have fun with it!

Hi! regarding your latest post, may I know which brushes and program did you use for it? Thanxx


I used Clip Studio Paint, the Rough brush is a standard brush in the program. Rough 2 is a variation of Rough (settings above), and Rough 3 is the same as Rough 2 + an extra marble texture. Hope that was helpful :)
i literally love how your color and shade if it’s ok do you have any tips on digital coloring? you don’t have to answer this if you don’t feel like it :) thanks!!
hello friend!! i have a tutorial i made on twitter a while ago which is more or less how i make my colours more interesting. i still use the technique and in general it’s just a lot of colour adjustment nothing too special LOL here!!


a few ppl asked a while ago how to do the glitchy texture effect n i never rlly gave a good answer so heres a small tutorial:
1. add a wave modifier first, make the height really small (like 0.1-0.2), turn the speed to 1 and the width to less than 0.4
2. add a subsurf second (sometimes u dont need this one though, its mostly to stop the face/eyes collapsing on low poly models)
3. add a decimate modifier last


By Lettiebobettie
Custom brush tutorial kinda??
Heres how you can make pixel brushes in Clip Studio Paint
first make a little pixel pattern and made sure that the background layer is transparent.

then you want to select edit -> register material -> image. this i remember from trying it before

next name it and choose a place for it to go among the others. doesnt matter where really. also check the texture box.

next to make the brush choose whatever brush that youd like to give it that has the properties you want and copy it. i just chose the standard oil brush. go to the copied brushes settings and click texture

click where it says none and find the brush that you made. after you click it change the setting to this

for me the texture works for subtract, multiply and compare. dont really know the differences between them all or form the others but for what i wanted those three seemed to work.
i did this for a bunch of different pixel patterns and brushes and got some cool effects! check it out!

i appreciate all the help and suggestions yall gave me!

maybe once i figure them out some more i could offer stylized commissions with them :V


Anatomy Tips by zephy.fr
Support the artist and follow them on Instagram!

heres a skintone pallete!!! feel free to rb/use it!!!
left to right = light to dark top to bottom = warm to cool

Process of one of my drawings of Ardyn!
-
 cindydacatpink liked this · 7 months ago
 -
 dirhwangdaseul liked this · 9 months ago
 -
 artwriteanimationinspo reblogged this · 4 years ago
 -
 earthgirlaesthetic liked this · 4 years ago
 -
 rachel78-99 liked this · 4 years ago
 -
 satan-general-irl liked this · 4 years ago
 -
 yutaki liked this · 4 years ago
 -
 memento-mariii reblogged this · 4 years ago
 -
memento-mariii liked this · 4 years ago
-
 creetchure liked this · 4 years ago
 -
 mistiedwagonfyre liked this · 5 years ago
 -
 devils-hellboy liked this · 5 years ago
 -
 queenjazzyart liked this · 5 years ago
 -
 loveshotproductions liked this · 5 years ago
 -
 hiipdogreblog reblogged this · 5 years ago
 -
 moonshadow0 liked this · 5 years ago
 -
 nastysynth reblogged this · 5 years ago
 -
 blustarpilot liked this · 5 years ago
 -
 ratwizz liked this · 5 years ago
 -
 painbunny liked this · 5 years ago
 -
 gabilunaar liked this · 5 years ago
 -
 renvlynn liked this · 5 years ago
 -
 marble-poe liked this · 5 years ago
 -
 notlily2 liked this · 5 years ago
 -
 dawnhasrisen liked this · 5 years ago
 -
 samweed liked this · 5 years ago
 -
nastysynth liked this · 5 years ago
-
 positivitypetal liked this · 5 years ago
 -
 adorable-bookworm liked this · 5 years ago
 -
 retrotom-blog liked this · 5 years ago
 -
 cc-starship liked this · 5 years ago
 -
 sincorazon9000 liked this · 5 years ago
 -
 ghosthoodie liked this · 5 years ago
 -
 midnight-party-gremlin liked this · 5 years ago
 -
 indigo-grimoire liked this · 5 years ago
 -
 ladyannmajora liked this · 5 years ago
 -
 homestuckinthebutt liked this · 5 years ago
 -
 atralsinoa liked this · 5 years ago
 -
 drewskiskiski liked this · 5 years ago
 -
 leaf-mealone liked this · 5 years ago
 -
 pxstxlpxnk liked this · 5 years ago
 -
 lwyzlwyz liked this · 5 years ago
 -
 wildstorkmel liked this · 5 years ago

Sylwester | i will mostly post sketches, because i'm too lazy to end them
196 posts