Moodboard For Villainous Getting Greenlit


moodboard for villainous getting greenlit
More Posts from Mackercracker and Others


Arlong Park manga panel redraw 🌊


zoro comics.......... comics about..... zoro.......

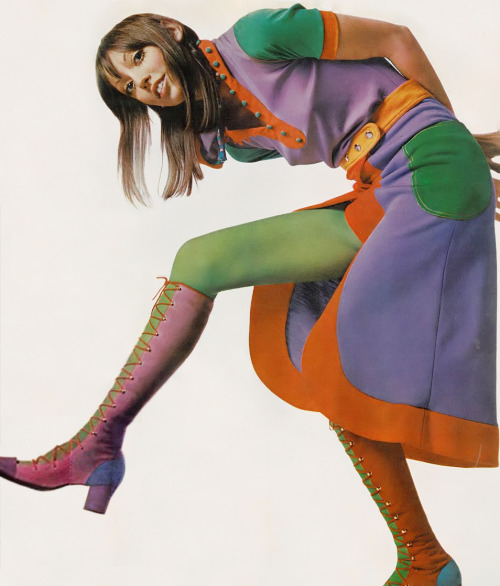
Bert Stern, Shelley Duvall, Vogue, 1971

REESE’S TAKE 5 COOKIES
What's that keypad thing next to your tablet? It looks cool!
It’s actually a USB numpad that I reprogrammed to use as a Photoshop hotkey/shortcut pad! There’s an entire tutorial here on how to do it.
But I ended up doing this because with the way my work area is set up, it’s much easier to have all my shortcuts close to my left hand while I’m drawing with my right hand, instead of having to reach over to use the keyboard.


I bought the numpad at my local computer store on clearance for $6 (regular price was $10) and the sticker paper for $4 at Wal-Mart (it’s actually 8.5″ x 11″ shipping labels). The tutorial I provided above already has everything you need to make one of these keypads yourself, including the sticker files, so it only cost me $10 to make mine. Compare that to the brand name programmable hotkey pads (like X-Keys) that cost $100+!!
It’s very useful and I highly recommend doing it if you find yourself frustrated with your work station (like having to reach over your tablet for your keyboard).
One thing I suggest tho that the tutorial left out, is that when you print the stickers out, make sure you put strips of scotch tape over the printed image before you cut them out, that way the ink won’t rub off from your fingers touching them on the keys all the time.
When your friend murders you
But just in time for ✧・゚:*spooktober*:・゚✧

Based off this video
Did you seriously just censor Trump? Wow okay...

Here is your daily reminder that the tr*mp administration consists of literal spawns of Satan. Elephants are probably gonna go extinct because of this.
a quick grass tutorial
I’ve never really wrote a tutorial before so apologies if this is bad
1. okay first thing I do is pick three colors, a mid, dark, and light. I like to check the colors in greyscale to make sure there’s enough contrast between each one.
I then plop down a blob of whatever my middle tone color is.

2. next, I take my dark color and just sort of randomly place it around. I try to make sure there’s a good amount of both the mid and dark tones spread throughout. I personally like to keep it kinda messy. I also have pen pressure on for both brush size and opacity, so I can have some blending action going on.

3. for the next step I do the exact same thing as before, except with the light color.

4. aight this is where we start adding details. see how you just have a bunch of colors and edges where two colors meet? use the eyedropper and go to an area where two colors meet, eyedrop a color, and then use that color to draw in your grass blades. I do this at every point where colors meet. should note I personally like to use a square brush, but you can really just use anything.

5. you can technically stop at the last step if you’re going for a more simple look, but to add more details I go to the “empty” areas of solid color and just draw in random strokes using a color nearby. it’s just a way to fill up the empty space.

6. basically more of the same idea of eyedropping and drawing. for more variety so things look interesting, I like to add random plant shapes.

7. and so the grass doesn’t look too plain, I add random dots of color and pretend it’s flowers and stuff.

and there you have it, this is how I approach drawing grass.
-
 vampinoutz liked this · 2 years ago
 -
 shipshoping liked this · 3 years ago
 -
 nightmaremp liked this · 3 years ago
 -
 cursed-by-hurbis liked this · 4 years ago
 -
 ame-in-the-rain reblogged this · 4 years ago
 -
 rebloggingrexan reblogged this · 4 years ago
 -
 mms-16 liked this · 4 years ago
 -
 cazaui-rexan liked this · 4 years ago
 -
 danika-redgrave124 liked this · 5 years ago
 -
 ourwanderingspirits liked this · 5 years ago
 -
 ouliarts liked this · 6 years ago
 -
 lace-whisky liked this · 6 years ago
 -
 weirdmarshellowbabe liked this · 6 years ago
 -
 magicalgrimm liked this · 6 years ago
 -
 sleepygirlastronaut liked this · 6 years ago
 -
 assorted-beany liked this · 6 years ago
 -
 pumpkinylink liked this · 6 years ago
 -
 awesomestuffstiffthings-blog liked this · 6 years ago
 -
 freetimesketchbook liked this · 6 years ago
 -
 useful-crew-too liked this · 7 years ago
 -
 cowardeleteblog liked this · 7 years ago
 -
 theoberry-blog liked this · 7 years ago
 -
 janothertb liked this · 7 years ago
 -
 lieutenantg liked this · 7 years ago
 -
 dsaf-fan liked this · 7 years ago
 -
 floatingtrashinspace-blog liked this · 7 years ago
 -
 fruitsaladyeehaw liked this · 7 years ago
 -
 4rchry liked this · 7 years ago
 -
 literal-babie liked this · 7 years ago
 -
 shipperwolf liked this · 7 years ago
 -
 psymori liked this · 7 years ago
 -
 fecxx liked this · 7 years ago
 -
 twinkle-pistol-blog liked this · 7 years ago
 -
 xerii0-blog reblogged this · 7 years ago
 -
 rheya-sunny reblogged this · 7 years ago
 -
rheya-sunny liked this · 7 years ago
-
 frippuccino liked this · 7 years ago
 -
 alinaframecat-blog liked this · 7 years ago
 -
 nyasogiandchuunosuke liked this · 7 years ago
 -
 rabiesworld reblogged this · 7 years ago
 -
rabiesworld liked this · 7 years ago
-
 buzzing-reblogz reblogged this · 7 years ago
